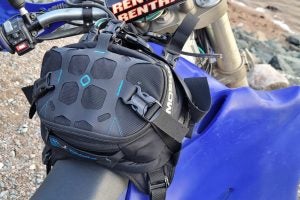
The folks at SHAD recently contacted the folks at ADVrider wondering if any of us would like to review their luggage. Until the G310 GS came into my life, I didn’t own anything SHAD made luggage for. But the 310 begs for adventure luggage for long back-roads and dirt roads travel, so here we are.
First Service On the 310
First, though, an update on the bike: it was time for its break-in service. I brought it back to the dealer because it had some trouble early in its life (spoiler alert: it shipped with a bad crankshaft position sensor). The dealer changed the oil and retorqued the steering head as well as all of the other “essential fasteners.” I also asked them to address an oil weep that got my sight glass and kick-stand grimy. The oil drain bolt had been weeping, and they retorqued it after the oil change. I’ll keep an eye on that for sure.
That first service cost me $340 and two hundred-mile round trips, but gave me a little peace of mind. I’ll be doing all of the rest of the services on the bike myself.
Which Luggage?
I installed a silver SHAD TERRA top case (TR37) and a pair of TERRA side cases (TR36) on the bike, along with all the mounting hardware. I’ve been test-riding the bike with them all installed.
First, I’ll admit that off the bat I didn’t read all the directions closely enough to note that the folks at SHAD recommend installing the side cases first, and then the top case. Predictably, I installed the top case before I read that recommendation. It turns out that’s a complete non-issue on the GS, and only matters on the 310 R variant. On the GS, the top case hardware and the side case hardware are completely separate and can be installed in any order.
Attaching the top case to the bike is one of the easiest add-ons I’ve ever bolted to a bike. There’s a “master” plate, and that bolts to the bike’s four pre-existing top-plate mounting holes. The aluminum top case mounting plate bolts to that, and the case holds onto the plate. The “master” plate is bike-specific, and provides the mount points for the luggage-specific plate. This system makes the top plate universal.
Installation Notes: Top Case
I didn’t need to pull anything off the bike. Four bolts, spacers and nuts secured the mounting plate, and another four bolts, washers, and spacers secured the aluminum plate. The whole process involved only a couple of slightly tricky parts.
First, before installing anything, I recommend carefully, but fully, threading the aluminum plate mounting bolts into the threaded but lightly powder-coated holes in the master plate. This will help with alignment later, and you won’t experience that familiar am-I-cross-threading-this cruddy-thread feel.

SHAD TERRA Master Plate, then Aluminum Mount Plate. Photo: Kate Murphy
Threading bolts through the top plate into the threaded master plate and then further threading nuts onto those same bolts is very belt-and-suspenders. I get it, but the clearance is a bit tight, so lining everything up is on the tricky side. Small hands help here.

The four Mount Plate bolts thread into the Master Plate. You’ll want to back them all out to give yourself clearance for the four additional nylock nuts. A thin closed-end wrench is your friend. Photo: Kate Murphy
Still, eight bolts and two plates, and the top case is ready to go.
The side case mounting hardware is a smidge more involved.
Installation Notes: Side Cases and Hardware
This kit, the 3P system, includes all the hardware necessary for mounting on both the GS and R variants. While the pile of bolts and spacers seems like a lot, you’re not using them all.

Line it all up, measure it, and throw away about a third. Photo: Kate Murphy
There are two grab-rail bolts under each side of the GS’s tail, which get replaced with the longer bolts in the kit. On the exhaust side, the rack further mounts to the exhaust bolt. On the chain side, the rack shares the passenger peg mount bolt.
The directions imply you’ll have to remove some bodywork, but I only ended up needing to do that on the exhaust side, and only because the under-tail bolt holes didn’t quite line up with the holes in the frame (very un-BMW, there, BMW). But I got everything threaded in finger tight, and then replaced the exhaust mount bolt with one of the supplied bolts. I did the same on the other side, without needing to remove any body work, and without any frame hole problems. The pivot bolt on the passenger peg, on that side, gets replaced with a threaded bolt for the bag hardware.
Sorting Out All The Parts
The directions for these racks consist of only pictures, so figuring everything out was a bit of a challenge. Also, if you’re kind of OCD like me, and break out your micrometer and measure everything to make sure you have all the right parts in the right order, NOTE. The bolts are 5 mm off their advertised length. Just lay them all out, to make sure you have one short, five of the same mid-length, and four long. For the GS install, pull four of the five middle bolts out and put them right into your “random bolts” jug. Also remove the four mid-length spacers; you’ll only need the four longest and the one smallest.
Slight Deviation From the Instructions
As with any install, fitting all the bolts and spacers loosely before tightening anything down is the way to go. Oddly, on my bike, I needed to swap the placement of the “11” and “12” spacers on the chain side, in order to get the third mount point to line up. That is, the shorter spacer went toward the rear of the bike on the right (starboard) side of the bike, and the shorter spacer went toward the front of the bike on the other side. This allowed for the best alignment with the foot-peg mount.

The suggested bolt is obviously too short, even without the spacer. Swap with the bolt from the other side and it’s MUCH better. Photo: Kate Murphy
Further, I found the instructions themselves swapped the recommended bolts on the exhaust mount and foot-peg mount. The short bolt (8) goes on the exhaust mount and the long bolt (5) goes on the foot-peg.
Turn Signal Interference
Once installed, on my (obviously) US-spec machine, the racks present with what you might call an “interference fit” with the turn signals. I contacted our friendly SHAD rep about this and he said that it was a result of the racks’ Spanish design – EU-spec motorcycles have shorter turn-signal stalks.

The signals are hidden and a bit wedged, but the bags work great. Photo: Kate Murphy
The turn signals did not present a problem mounting the bags onto the racks. I did note though that the bags block the view of the rear turn signals from any angle except directly behind the bike. More on that later.
I took the bike for a quick blat around the neighborhood with the empty bags on, to make sure everything worked. No problems at all.
I then loaded the bike up with a travel guitar and several books of music (and a music stand) and rode to a friend’s place for a mid-afternoon “jam.” The bike definitely noticed the weight back there. Suspension upgrades might come sooner than expected.

The bags feel a bit huge from the rider’s perspective, but don’t look huge on the road. Photo: Kate Murphy
About the Bags
Before SHAD offered these to me for testing, I was determined to find top-loading adventure bags for this bike. I’ve been dealing with clamshell luggage for decades now. Searching for anything in my packed (Givi) clamshell saddlebags meant fighting gravity and the occasional Great Roadside Luggage Barf. Trying to balance keeping a bag from opening up and letting all your stuff tumble out, against pushing too hard against the bike from the kickstand side in the process, is not one of my favorite activities.

Left to Right from Top: Empty bag, bag liner, it’s expandable!, liner in case. Photo: Kate Murphy
The SHAD saddlebags, while they’re clamshell-style, offer some thoughtful mitigating features. They have shelves installed that keep what’s packed in there from falling directly down. There are also optional nets that stretch from those shelves to mount points on the inside tops of the bags. For $11 each, I highly recommend them. SHAD also offers bag liners, to further organize all your stuff in the luggage. These are thoughtfully designed, too. They’re expandable, and have a top divot to accommodate the interior latch mechanism. They take up a little interior space but keep your stuff from rubbing on the raw aluminum interior and turning black.
Great Construction
If, like me, your only experience with SHAD luggage was circa 2010 when they were scooter-oriented and looked like cheap Givi stuff, prepare to be impressed. I am. These things are moderately beefy and really thoughtfully designed. They’re not super heavy, though, which the 310 appreciates. The mounting hardware is solid, and on par with any other major motorcycle luggage brand. They are not frame sliders by any means, and wouldn’t hold up unscathed to anything more than a 0-mph drop.
As noted, the bags are bare aluminum. That means they’re lightweight but they do scratch and mar easily. If your bike is a showpiece, think twice about these aluminum bags. The black ones might be better on this front. Since I don’t know anyone who puts aluminum cases on a show bike, it’s probably a non-issue. I’ll likely be covering them with stickers anyway.

Scratches from stacking the cases and moving them around my garage. Photo: Kate Murphy
For the slightly-hinky instructions and the turn signal issue, I’ll give this set four and a half out of five stars. Would I have purchased this set myself? As I previously admitted, I was kind of done forever with clamshell luggage. But these SHAD bags and accessories have changed my mind. If I crash the bike and mess them up, I’ll replace them.
Next up: winter is beginning to settle in here in New Hampshire, so I’ll be figuring out those heated grips. I’ll probably also replace the turn signals on the back of the bike. Shorter stalks will play nicer with the bag mounts. I also have plans to wire in some flat bag-mounted signals with quick-release wiring, so my signals are more visible in traffic with these bags mounted.